
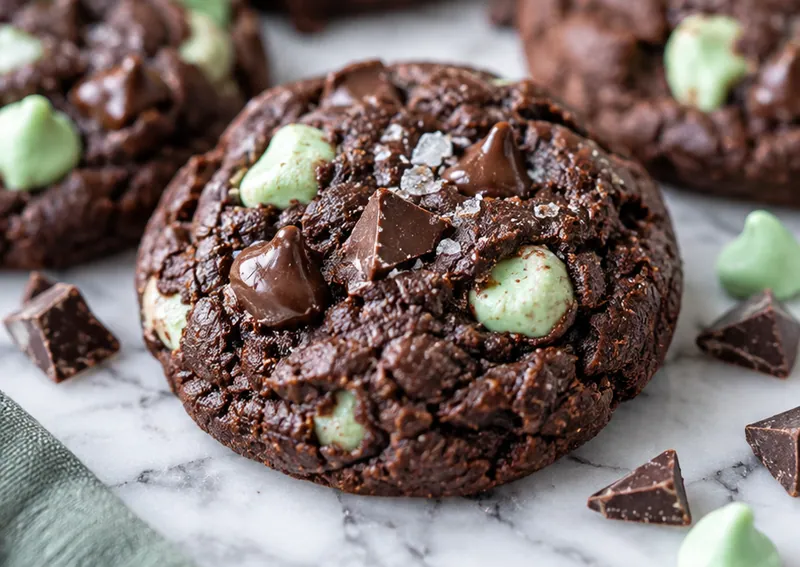
The moment these Mint Chocolate Cookies come out of the oven, the kitchen smells like a fresh patch of mint garden wrapped in sweet cocoa, with a soft, tender edge that immediately begs for one more bite.
Make them when you need a pretty party treat, a fun lunch box surprise, or a simple afternoon pick me up after a long day.
 Save
SaveI first rolled these out for a spring tea, and watching friends close their eyes after the first bite, trying to figure out where the mint ends and the chocolate begins, is still one of my favorite food moments.
Mint Chocolate Cookies Recipe
Ingredients
Cookie dough
Minty coating
Instructions
- Whisk dry ingredients
In a medium bowl, whisk together the flour, baking soda, and salt until well combined.
- Cream softened butter and sugars
In a large bowl, beat the softened butter, granulated sugar, and brown sugar with a handheld mixer on medium speed until light and fluffy, about 2 to 3 minutes.
- Add egg and extracts
Beat in the egg, vanilla extract, and peppermint extract until smooth and fully incorporated.
- Combine wet and dry
Gradually add the dry ingredients to the wet ingredients, mixing on low speed until just combined and no streaks of flour remain.
- Stir in chocolates
Fold in the semi sweet chocolate chips and dark chocolate chunks with a spatula until evenly distributed.
- Chill the dough
Cover the bowl and chill the dough in the refrigerator for at least 2 hours, or up to overnight, to help the cookies hold their shape and develop flavor.
- Scoop and shape
Preheat your oven to 350 degrees Fahrenheit. Line baking sheets with parchment paper. Roll tablespoonfuls of dough into balls and place them about 2 inches apart on the prepared sheets.
- Bake until set
Bake for 9 to 11 minutes, or until the edges are set but the centers still look slightly soft. They will continue to cook on the hot sheet.
- Cool on the sheet
Let the cookies cool on the baking sheet for 5 minutes, then transfer them to a wire rack to cool completely before glazing.
- Make the mint glaze
In a small bowl, whisk the melted butter, powdered sugar, peppermint extract, and milk until smooth. Add more milk a teaspoon at a time if you want a thinner glaze.
- Glaze and finish
Dip the top of each cooled cookie into the glaze, letting the excess drip off, then immediately roll the cookie into the crushed peppermint candies until fully coated. Set them on a parchment lined tray to set.
Substitutions and variations
- Use salted butter and reduce added salt to 1/8 teaspoon if you prefer.
- Swap semi sweet chocolate chips for white chocolate chips for a sweeter contrast.
- If you do not have peppermint extract, use 1/2 teaspoon vanilla extract and add a drop of green food coloring for a festive look.
- Use a gluten free flour blend in place of all purpose flour for a gluten free version.
- Replace powdered sugar with an equal amount of finely blended granulated sugar for a less gritty coating.
Chloe's tips
- Chill the dough thoroughly so the cookies bake evenly and stay tender.
- For a stronger mint hit, add a few drops of liquid green food coloring to the glaze.
- Use crushed candy canes or peppermint hard candies in a food processor for a homemade crushed peppermint option.
- Store fully coated cookies in an airtight container at room temperature to keep the glaze from melting.
- If the glaze thickens too much, gently warm it in the microwave for 5 to 10 seconds and stir before dipping.
How to store it
- Keep cookies in an airtight container at room temperature for up to 5 days.
- For longer storage, freeze the baked, unglazed cookies for up to 3 months and glaze after thawing.
- Avoid refrigerating cookies, as the moisture can soften the glaze and make the cookies soggy.
Serving suggestions
Serve these Mint Chocolate Cookies on a pretty plate for dessert or tuck them into lunchboxes for a cool surprise.
- Dust with extra powdered sugar just before serving for a festive touch.
- Pair with a glass of cold milk or a cup of mint tea for a refreshing finish.
- Arrange cookies on a tiered stand at parties for an eye sweet treat.
Frequently asked questions
Can I use a different type of mint extract
Yes, you can try natural mint extract, but avoid using imitation mint flavoring with a harsh alcohol taste, as it may affect the texture and flavor.
Why are my cookies spreading too much on the baking sheet
This usually happens when the dough is too warm or under chilled. Make sure the dough is well chilled and use a cool baking sheet for best results.
Can I make these cookies gluten free
Yes, swap the all purpose flour for a gluten free flour blend that includes xanthan gum or add 1/2 teaspoon of xanthan gum per cup of flour.
How do I store the cookies with the mint glaze
Store them in a single layer in an airtight container at room temperature. Do not refrigerate, as the glaze may become sticky and the cookies can absorb excess moisture.
Let's get cooking!
These Mint Chocolate Cookies are playful, flavorful, and surprisingly easy to make, so go ahead and whip up a batch. Your friends, family, and your sweet tooth will thank you.