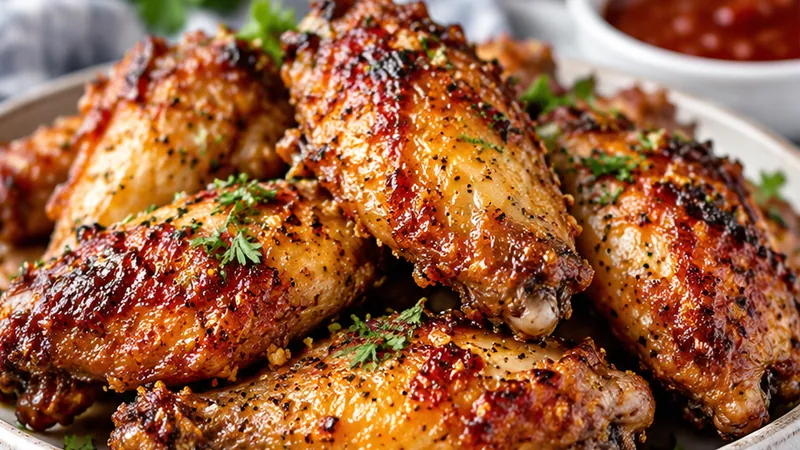
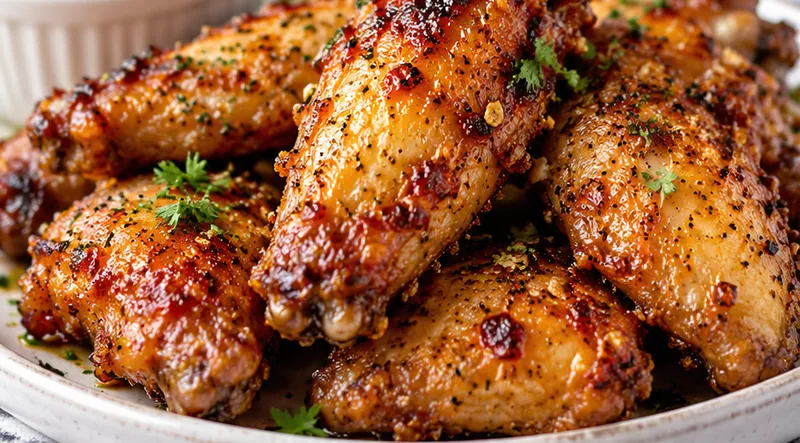
There is something wonderful about biting into a chicken wing and hearing that crackle. These crispy baked chicken wings have deeply golden, shatteringly crisp skin on the outside and tender, juicy meat inside, all without a drop of frying oil. The kitchen smells of roasted garlic and smoked paprika while they bake, and everyone starts hovering around the oven long before the timer goes off.
Make these for game day, a Friday night movie marathon, a birthday get-together, or any evening when you want finger food that feels like a treat. The secret is a light coating of baking powder and salt, which draws moisture out of the skin and helps it brown and blister in the oven. Because they bake on a rack, the hot air circulates all around each wing, so there is no flipping through grease and no soggy bottoms.
 Save
I used to think restaurant-style wings were something you could only get from a deep fryer, and I dreaded the mess and the smell of hot oil in the house. The first time a tray of these came out of my oven, my family polished off the whole batch before I could even snap a photo. Now they are my go-to whenever friends text asking what they can bring or what I am making.
Crispy Baked Chicken Wings
Ingredients
Wings
Buffalo Butter Glaze (optional)
For Serving
Instructions
- Heat the oven and prep the pan
Position an oven rack in the upper third of the oven and preheat to 425°F. Line a large rimmed baking sheet with aluminum foil for easy cleanup, then set a wire cooling rack on top. Lightly coat the rack with nonstick cooking spray so the skin does not stick.
- Dry the wings thoroughly
Place the wings on a plate lined with several layers of paper towels and pat each one very dry on all sides. This step matters more than any other, because dry skin is what turns crisp in the oven. For even better results, leave the patted wings uncovered in the refrigerator for 30 minutes.
- Mix the seasoning
In a small bowl, whisk together the baking powder, kosher salt, smoked paprika, garlic powder, onion powder and black pepper until the mixture is a uniform color with no clumps of baking powder.
- Coat the wings
Transfer the dry wings to a large bowl. Sprinkle the seasoning mixture over them and toss with your hands until every wing is lightly and evenly coated. The coating should look like a thin, dusty film, not a thick paste.
- Arrange on the rack
Lay the wings skin side up on the prepared rack in a single layer, leaving about 1/2 inch of space between each one. Crowding traps steam and keeps the skin from crisping, so use a second pan if you need to.
- Bake the first side
Slide the pan into the upper third of the oven and bake for 25 minutes, until the fat has started to render and the skin looks lightly golden and tight. Do not open the oven door during this time, so the heat stays steady.
- Flip and finish baking
Use tongs to carefully turn each wing over, then bake another 20 to 25 minutes, until the skin is deep golden brown, puffed and crackly. The wings are done when an instant-read thermometer inserted into the thickest part, without touching bone, reads at least 175°F.
- Make the glaze
While the wings finish, whisk the hot sauce, melted butter and honey together in a large bowl until smooth and glossy. If you prefer your wings plain, skip this step and serve them straight from the oven.
- Toss and serve
Remove the wings from the oven and let them rest for 2 minutes. Add them to the bowl with the glaze and toss gently until each wing is coated. Arrange on a platter right away so the skin stays crisp, and serve with ranch or blue cheese dressing and the celery and carrot sticks.
Substitutions and variations
- Use aluminum-free baking powder so the wings do not pick up a metallic aftertaste; cornstarch can replace it, but the skin will be slightly less blistered.
- Swap the Buffalo glaze for 1/2 cup of your favorite barbecue sauce, or toss the wings in 1/3 cup honey mixed with 2 tablespoons soy sauce and a minced garlic clove for a sticky sweet-savory finish.
- For a lemon pepper version, skip the glaze and toss the hot wings with 2 tablespoons melted butter, 1 tablespoon lemon zest and 2 teaspoons black pepper.
- Use whole wings if that is what you can find; just cut them at the joints yourself with a sharp knife, or bake them whole and add about 5 minutes to the cooking time.
- Try an air fryer by cooking the seasoned wings in a single layer at 400°F for 24 to 28 minutes, flipping halfway.
Chloe's tips
- Pat the wings completely dry. Any surface moisture turns to steam in the oven and softens the skin.
- Always bake on a wire rack set over a pan. Wings sitting directly on the pan will fry in their own fat and turn soggy underneath.
- Use baking powder, not baking soda. Baking soda leaves a soapy taste, while baking powder raises the pH of the skin just enough to brown beautifully.
- Sauce the wings at the very end, right before serving. Waiting keeps the skin crackly instead of soft.
- Ovens vary, so check the wings at the 40 minute mark and move the pan to the top rack for the last 5 minutes if you want extra browning.
How to store it
- Store leftover unsauced wings in an airtight container in the refrigerator for up to 4 days.
- Reheat refrigerated wings on a wire rack in a 400°F oven for 10 to 12 minutes, or in an air fryer for 5 to 6 minutes, to bring back the crispness. The microwave will make the skin soft.
- Freeze cooled, unsauced wings in a single layer on a tray, then transfer to a freezer bag for up to 3 months. Reheat straight from frozen at 400°F for 18 to 20 minutes.
Serving suggestions
These wings are made for sharing, so set them in the middle of the table with plenty of napkins and something cool to dip into.
- Creamy ranch or blue cheese dressing and crunchy celery and carrot sticks
- Crispy oven fries or a big bowl of tortilla chips with queso
- A creamy coleslaw or a crisp green salad to balance the heat
- Ice-cold lemonade, sweet tea or your favorite beer
Frequently asked questions
Why aren't my baked chicken wings crispy?
The usual causes are wet skin, a crowded pan or no wire rack. Pat the wings very dry, use the baking powder coating, leave space between each wing and bake them on a rack so hot air can reach every side.
Can I make the wings ahead of time?
Yes. Bake them until crisp, cool, then refrigerate unsauced for up to a day. Reheat on a rack in a 400°F oven for 10 to 12 minutes, then toss with the sauce just before serving.
Do I need to thaw frozen wings first?
Yes, thaw them completely in the refrigerator overnight, then pat them very dry. Wings that are still icy release water in the oven and will not crisp properly.
What temperature should chicken wings reach?
Chicken is safe at 165°F, but wings are more tender and the skin is crispier when cooked to 175°F or a little higher, since the connective tissue has more time to soften.
Let's get cooking!
Once you taste how crisp and juicy these wings come out of a regular home oven, you may never want to deep fry again. Put on the game, set out the dips and enjoy every messy, finger-licking bite with the people you love.