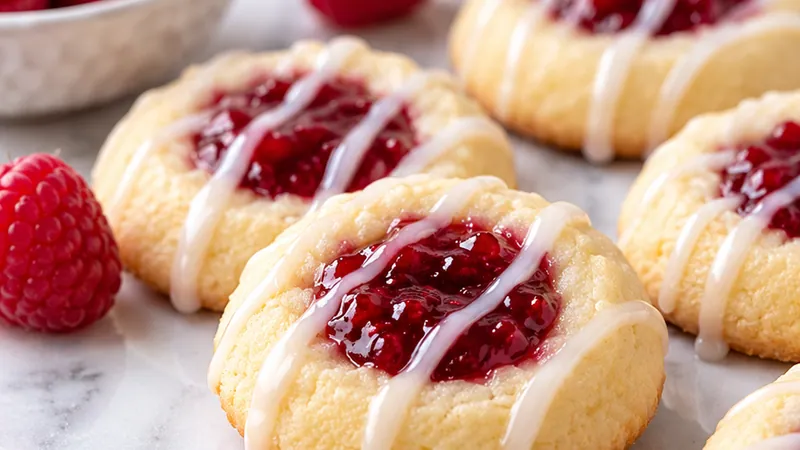
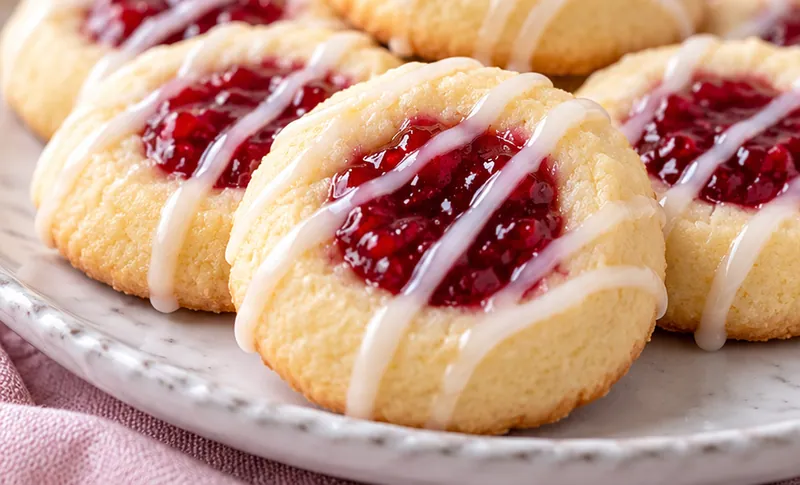
There is something so cheerful about a tray of Raspberry Thumbprint Cookies cooling on the counter. Each little round is pale golden at the edges, soft and crumbly in the middle, and crowned with a shiny pool of ruby red jam. The kitchen fills with the cozy scent of butter, vanilla, and a whisper of almond, and that first bite gives you a delicate shortbread crumb followed by a bright, tangy pop of raspberry.
I make these every December for cookie exchanges and holiday platters because they look fancy but come together with pantry staples and one bowl. They are just as lovely for baby showers, Valentine's Day, Easter brunch, or an afternoon cup of tea. The dough is forgiving, the cookies hold their shape beautifully, and they keep well for days, so you can bake ahead and still have something pretty to share.
 Save
My favorite part is getting the kids involved. Little thumbs are perfect for pressing the wells, and everyone gets very serious about filling them with jam right to the top. If you grew up with a grandma who always had a tin of jam cookies tucked away in the pantry, this recipe will feel like a warm hug from those memories.
Raspberry Thumbprint Cookies
Ingredients
Cookie Dough
Filling
Vanilla Drizzle
Instructions
- Cream the Butter and Sugar
In a large bowl, beat the softened butter and granulated sugar with a hand mixer or stand mixer on medium speed for 2 to 3 minutes, until the mixture is pale, fluffy, and noticeably lighter in color. Scrape down the sides of the bowl once halfway through so everything mixes evenly.
- Add the Yolks and Extracts
Add the egg yolks, 1 teaspoon vanilla extract, and the almond extract. Beat on medium speed for about 1 minute, until smooth and creamy with no streaks of yolk remaining.
- Mix in the Dry Ingredients
In a separate bowl, whisk together the flour and salt. Add it to the butter mixture in two additions, mixing on low speed just until a soft dough forms and no dry flour is visible. Stop as soon as it comes together so the cookies stay tender rather than tough.
- Chill the Dough
Cover the bowl with plastic wrap and refrigerate the dough for 30 minutes. This firms up the butter so the cookies hold their round shape and the jam wells do not spread flat in the oven.
- Preheat and Prep the Pans
While the dough chills, position a rack in the center of the oven and preheat to 350°F. Line two large baking sheets with parchment paper or silicone baking mats.
- Shape the Dough Balls
Scoop the chilled dough by level tablespoons and roll each portion between your palms into a smooth 1-inch ball. Place the balls about 2 inches apart on the prepared baking sheets, about 15 per sheet.
- Press the Thumbprints
Use your thumb or the rounded back of a 1/2 teaspoon measuring spoon to press a deep well into the center of each ball, about halfway down. If the edges crack a little, gently pinch them back together with your fingertips so the jam stays put.
- Fill with Raspberry Jam
Stir the raspberry jam in a small bowl until loose and smooth. Spoon about 1/2 teaspoon of jam into each well, filling it just to the top. A small zip-top bag with the corner snipped off makes this quick and tidy.
- Bake Until Just Golden
Bake one sheet at a time for 12 to 14 minutes, until the bottoms and edges are lightly golden and the tops look set but still pale. Let the cookies rest on the baking sheet for 5 minutes, then carefully transfer them to a wire rack to cool completely, about 15 minutes more. The jam will firm up as it cools.
- Drizzle with Vanilla Glaze
Whisk the powdered sugar, 2 teaspoons milk, and 1/4 teaspoon vanilla extract until smooth, adding the remaining teaspoon of milk only if needed to reach a thick but drizzly consistency. Drizzle thin lines across the cooled cookies with a spoon or piping bag and let the glaze set for 10 minutes before serving or stacking.
Substitutions and variations
- Swap the raspberry jam for strawberry, apricot, cherry preserves, or lemon curd to make a colorful assorted platter.
- If you do not care for almond flavor, leave out the almond extract and increase the vanilla to 1 1/2 teaspoons.
- For a gluten-free version, use a 1:1 gluten-free baking flour that contains xanthan gum and chill the dough for the full 30 minutes.
- Roll the dough balls in finely chopped walnuts or pecans before pressing the wells for a nutty, old-fashioned crunch.
- Salted butter works in a pinch; just skip the added salt in the dough.
Chloe's tips
- Make sure your butter is soft enough to press with a finger but not greasy or melted, or the cookies will spread.
- Spoon flour into the measuring cup and level it off instead of scooping, which packs in too much flour and makes the dough dry and crumbly.
- Seedless jam gives the smoothest, prettiest centers, but if you only have jam with seeds, warm it briefly and press it through a fine mesh strainer.
- Do not overfill the wells; jam that spills over the edges will burn onto the pan.
- Baking one sheet at a time on the center rack gives the most even color.
How to store it
- Store cooled cookies in an airtight container at room temperature for up to 5 days, layered between sheets of parchment so the jam does not stick.
- Freeze baked, unglazed cookies in a single layer, then transfer to a freezer bag for up to 3 months. Thaw at room temperature and add the drizzle before serving.
- The unbaked dough can be wrapped tightly and refrigerated for up to 3 days or frozen for up to 2 months. Thaw frozen dough in the fridge overnight before shaping.
Serving suggestions
These pretty jam cookies fit right in wherever a little sweetness is welcome.
- Arrange them on a holiday cookie platter alongside sugar cookies and gingerbread
- Serve with a hot cup of coffee, black tea, or creamy hot chocolate
- Pack them in a tin lined with tissue paper for an easy homemade gift
- Add them to a brunch or baby shower dessert table for a pop of color
Frequently asked questions
Why did my thumbprint cookies spread flat?
Spreading usually happens when the butter is too warm or the dough was not chilled. Make sure the butter is softened but still cool, chill the dough for the full 30 minutes, and use cool baking sheets for each batch.
Should I fill the cookies before or after baking?
For this recipe, fill them before baking. The jam sets into a glossy, slightly chewy center in the oven. If you prefer a fresher, looser jam, you can bake the cookies with empty wells, press the wells again while warm, and fill them once cool.
How do I keep the cookies from cracking when I press the centers?
Let the chilled dough sit at room temperature for 5 minutes if it feels very firm, and roll the balls until completely smooth. Small cracks around the edges are normal and can be pinched closed with your fingertips.
Can I make these cookies ahead for the holidays?
Yes. Bake and freeze them without the glaze for up to 3 months, or freeze the unbaked dough. Add the vanilla drizzle after thawing so it looks fresh and neat.
Let's get cooking!
Once you bake a batch of these Raspberry Thumbprint Cookies, I have a feeling they will become a permanent part of your holiday baking list. They are simple enough for a weeknight treat, special enough for a cookie swap, and always the first ones to disappear from the platter. So soften that butter, grab your favorite jar of jam, and get those thumbs ready. Happy baking, friend!